Learn how to create a moodboard with this step-by-step guide. Discover tips, tools, and examples to gather inspiration and streamline your design process effectively.
A moodboard is a powerful tool for designers to visualize ideas, gather inspiration, and communicate concepts effectively. Whether you’re working on a branding project, interior design, or a creative campaign, a moodboard can help you organize your thoughts and set the tone for your work. In this article, we’ll walk you through the process of creating a moodboard step by step, along with tips and tools to make the process seamless.
What is a Moodboard?
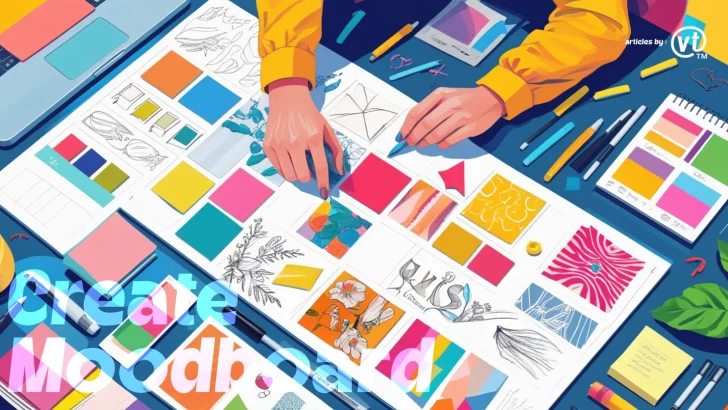
A moodboard is a collage of images, colors, textures, typography, and other visual elements that represent the overall feel and direction of a project. It serves as a visual reference to guide your design process and ensure consistency in your creative work.
Why Are Moodboards Important?
- Visualize Ideas: Moodboards help you translate abstract concepts into tangible visuals.
- Streamline Communication: They make it easier to convey your vision to clients, team members, or stakeholders.
- Maintain Consistency: A moodboard ensures that all design elements align with the project’s theme and goals.
- Spark Creativity: Gathering inspiration in one place can ignite new ideas and directions.
Step-by-Step Guide to Creating a Moodboard
Step 1: Define Your Project Goals
Before you start, clarify the purpose of your moodboard. Ask yourself:
- What is the project about?
- Who is the target audience?
- What emotions or messages do you want to convey?
Having a clear understanding of your goals will help you select the right elements for your moodboard.
Step 2: Gather Inspiration
Start collecting visual inspiration from various sources:
- Pinterest: Search for keywords related to your project and save pins that resonate with your vision.
- Instagram: Explore hashtags and profiles for trends and ideas.
- Design Blogs and Magazines: Look for articles and features that align with your project.
- Nature and Everyday Life: Sometimes, inspiration comes from the world around you.
Step 3: Choose Your Tools
Decide whether you want to create a physical or digital moodboard. Here are some popular tools for digital moodboards:
- Canva: User-friendly and great for beginners.
- Milanote: Perfect for collaborative projects.
- Adobe Spark: Offers professional templates and customization options.
- Pinterest: Ideal for collecting and organizing ideas.
Step 4: Select Key Elements
A moodboard typically includes the following elements:
- Color Palette: Choose colors that reflect the mood and tone of your project.
- Typography: Include font samples that match the style you’re aiming for.
- Imagery: Add photos, illustrations, or graphics that convey your vision.
- Textures and Patterns: Incorporate textures like fabric, wood, or gradients to add depth.
- Quotes or Keywords: Use words or phrases that capture the essence of your project.
Step 5: Arrange and Organize
Arrange your elements in a way that feels cohesive and visually appealing. Here are some tips:
- Group Similar Items: Place related elements together to create a sense of harmony.
- Balance Visual Weight: Distribute colors, textures, and images evenly across the board.
- Leave White Space: Avoid overcrowding; white space helps the design breathe.
Step 6: Refine and Finalize
Review your moodboard and make adjustments as needed:
- Does it align with your project goals?
- Does it evoke the desired emotions or messages?
- Is it visually balanced and cohesive?
Once you’re satisfied, save or export your moodboard for presentation or future reference.
Tips for Creating an Effective Moodboard
- Stay Focused: Stick to the theme and avoid adding unnecessary elements.
- Be Consistent: Ensure that all elements work together to create a unified look.
- Experiment: Don’t be afraid to try different layouts or combinations.
- Seek Feedback: Share your moodboard with others to get their input and suggestions.
Real-Life Examples of Moodboards
- Branding Projects: A moodboard for a luxury brand might include elegant fonts, gold accents, and high-end product imagery.
- Interior Design: A moodboard for a cozy living room could feature warm colors, soft textures, and rustic furniture.
- Fashion Design: A moodboard for a summer collection might include bright colors, floral patterns, and beach-inspired photos.
Conclusion
Creating a moodboard is an essential step in the design process that helps you visualize your ideas and stay on track with your project goals. By following this step-by-step guide, you can create a moodboard that not only inspires you but also effectively communicates your vision to others.
Start experimenting with moodboards today and see how they can transform your creative workflow!