Learn how to use moodboards to effectively communicate design ideas to clients. Discover tips and strategies to create impactful presentations and streamline the feedback process.
Moodboards are an invaluable tool for designers, not only for organizing ideas but also for effectively communicating design concepts to clients. They bridge the gap between abstract ideas and tangible visuals, making it easier for clients to understand and approve your vision. In this article, we’ll explore how to use moodboards to communicate design ideas to clients, along with tips to make your presentations more impactful.
Why Use Moodboards to Communicate with Clients?
- Visual Clarity: Moodboards provide a clear visual representation of your ideas, reducing misunderstandings.
- Streamlined Feedback: Clients can easily point out what they like or dislike, making the feedback process more efficient.
- Builds Trust: A well-crafted moodboard demonstrates your professionalism and attention to detail.
- Saves Time: By aligning expectations early, you can avoid costly revisions later in the project.
Step-by-Step Guide to Using Moodboards with Clients
Step 1: Understand the Client’s Vision
Before creating a moodboard, have a detailed discussion with your client to understand their goals, preferences, and expectations. Ask questions like:
- What is the purpose of the project?
- Who is the target audience?
- Are there specific colors, styles, or themes they want to include?
This information will serve as the foundation for your moodboard.
Step 2: Gather Relevant Inspiration
Collect visual elements that align with the client’s vision and your design direction. These may include:
- Color Palettes: Choose colors that evoke the desired emotions or match the brand identity.
- Typography: Include font samples that reflect the project’s tone (e.g., modern, classic, playful).
- Imagery: Use photos, illustrations, or icons that convey the project’s theme.
- Textures and Patterns: Add elements like fabric swatches, gradients, or geometric patterns to enhance the mood.
- Keywords or Quotes: Incorporate words or phrases that capture the essence of the project.
Step 3: Organize the Moodboard
Arrange the elements in a way that tells a cohesive story. Here’s how:
- Group Similar Items: Place related elements together to create a sense of harmony.
- Create a Visual Hierarchy: Use size and placement to highlight the most important elements.
- Leave White Space: Avoid clutter to ensure the moodboard is easy to read and visually appealing.
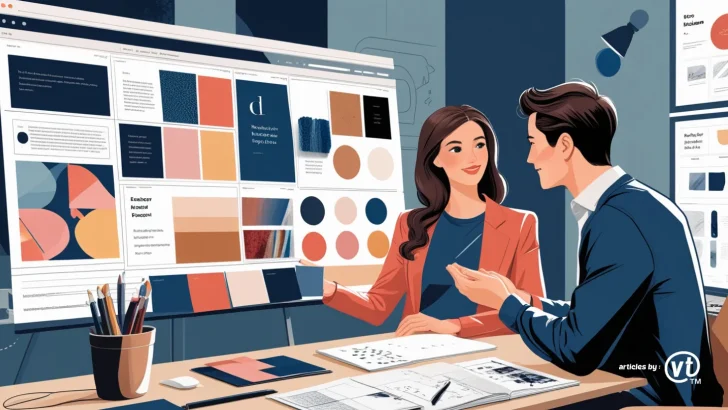
Step 4: Present the Moodboard to the Client
When presenting the moodboard, follow these tips to make the process smooth and effective:
- Explain the Concept: Start by describing the overall theme and how it aligns with the client’s goals.
- Highlight Key Elements: Point out specific colors, fonts, and imagery, and explain why you chose them.
- Tell a Story: Use the moodboard to narrate the journey of the design, from inspiration to execution.
- Encourage Feedback: Ask open-ended questions to understand the client’s thoughts and preferences.
Step 5: Refine Based on Feedback
After the presentation, gather the client’s feedback and make necessary adjustments. For example:
- If the client prefers a different color palette, update the moodboard accordingly.
- If they want a more minimalist approach, remove overly decorative elements.
This collaborative process ensures the final design meets the client’s expectations.
Tips for Effective Client Communication with Moodboards
- Keep It Simple: Avoid overwhelming the client with too many elements. Focus on the key ideas.
- Use High-Quality Visuals: Ensure all images and graphics are clear and professional.
- Be Prepared to Explain: Anticipate questions and be ready to justify your design choices.
- Show Variations: Present multiple moodboards if the client is unsure about a specific direction.
- Use Digital Tools: Platforms like Milanote, Canva, or Adobe Spark make it easy to create and share moodboards online.
Real-Life Examples of Moodboards in Client Presentations
- Branding Projects: A moodboard for a new café might include warm colors, rustic textures, and vintage typography to convey a cozy, welcoming atmosphere.
- Web Design: A moodboard for a tech startup could feature sleek fonts, futuristic imagery, and a monochromatic color scheme to reflect innovation.
- Interior Design: A moodboard for a modern apartment might include minimalist furniture, neutral tones, and geometric patterns to highlight a clean, contemporary style.
Conclusion
Moodboards are a powerful tool for communicating design ideas to clients. They provide a visual roadmap that aligns expectations, fosters collaboration, and ensures the final design meets the client’s vision. By following this step-by-step guide and incorporating the tips above, you can create compelling moodboards that make your client presentations more effective and impactful.
Start using moodboards in your next project and see how they transform your client communication process!